")
")

Log in to the Control Panel with your Hostpoint ID and click on the menu item «Domains» and on «Edit DNS Zone» to access the DNS administration.

You can now change or delete each DNS record individually.
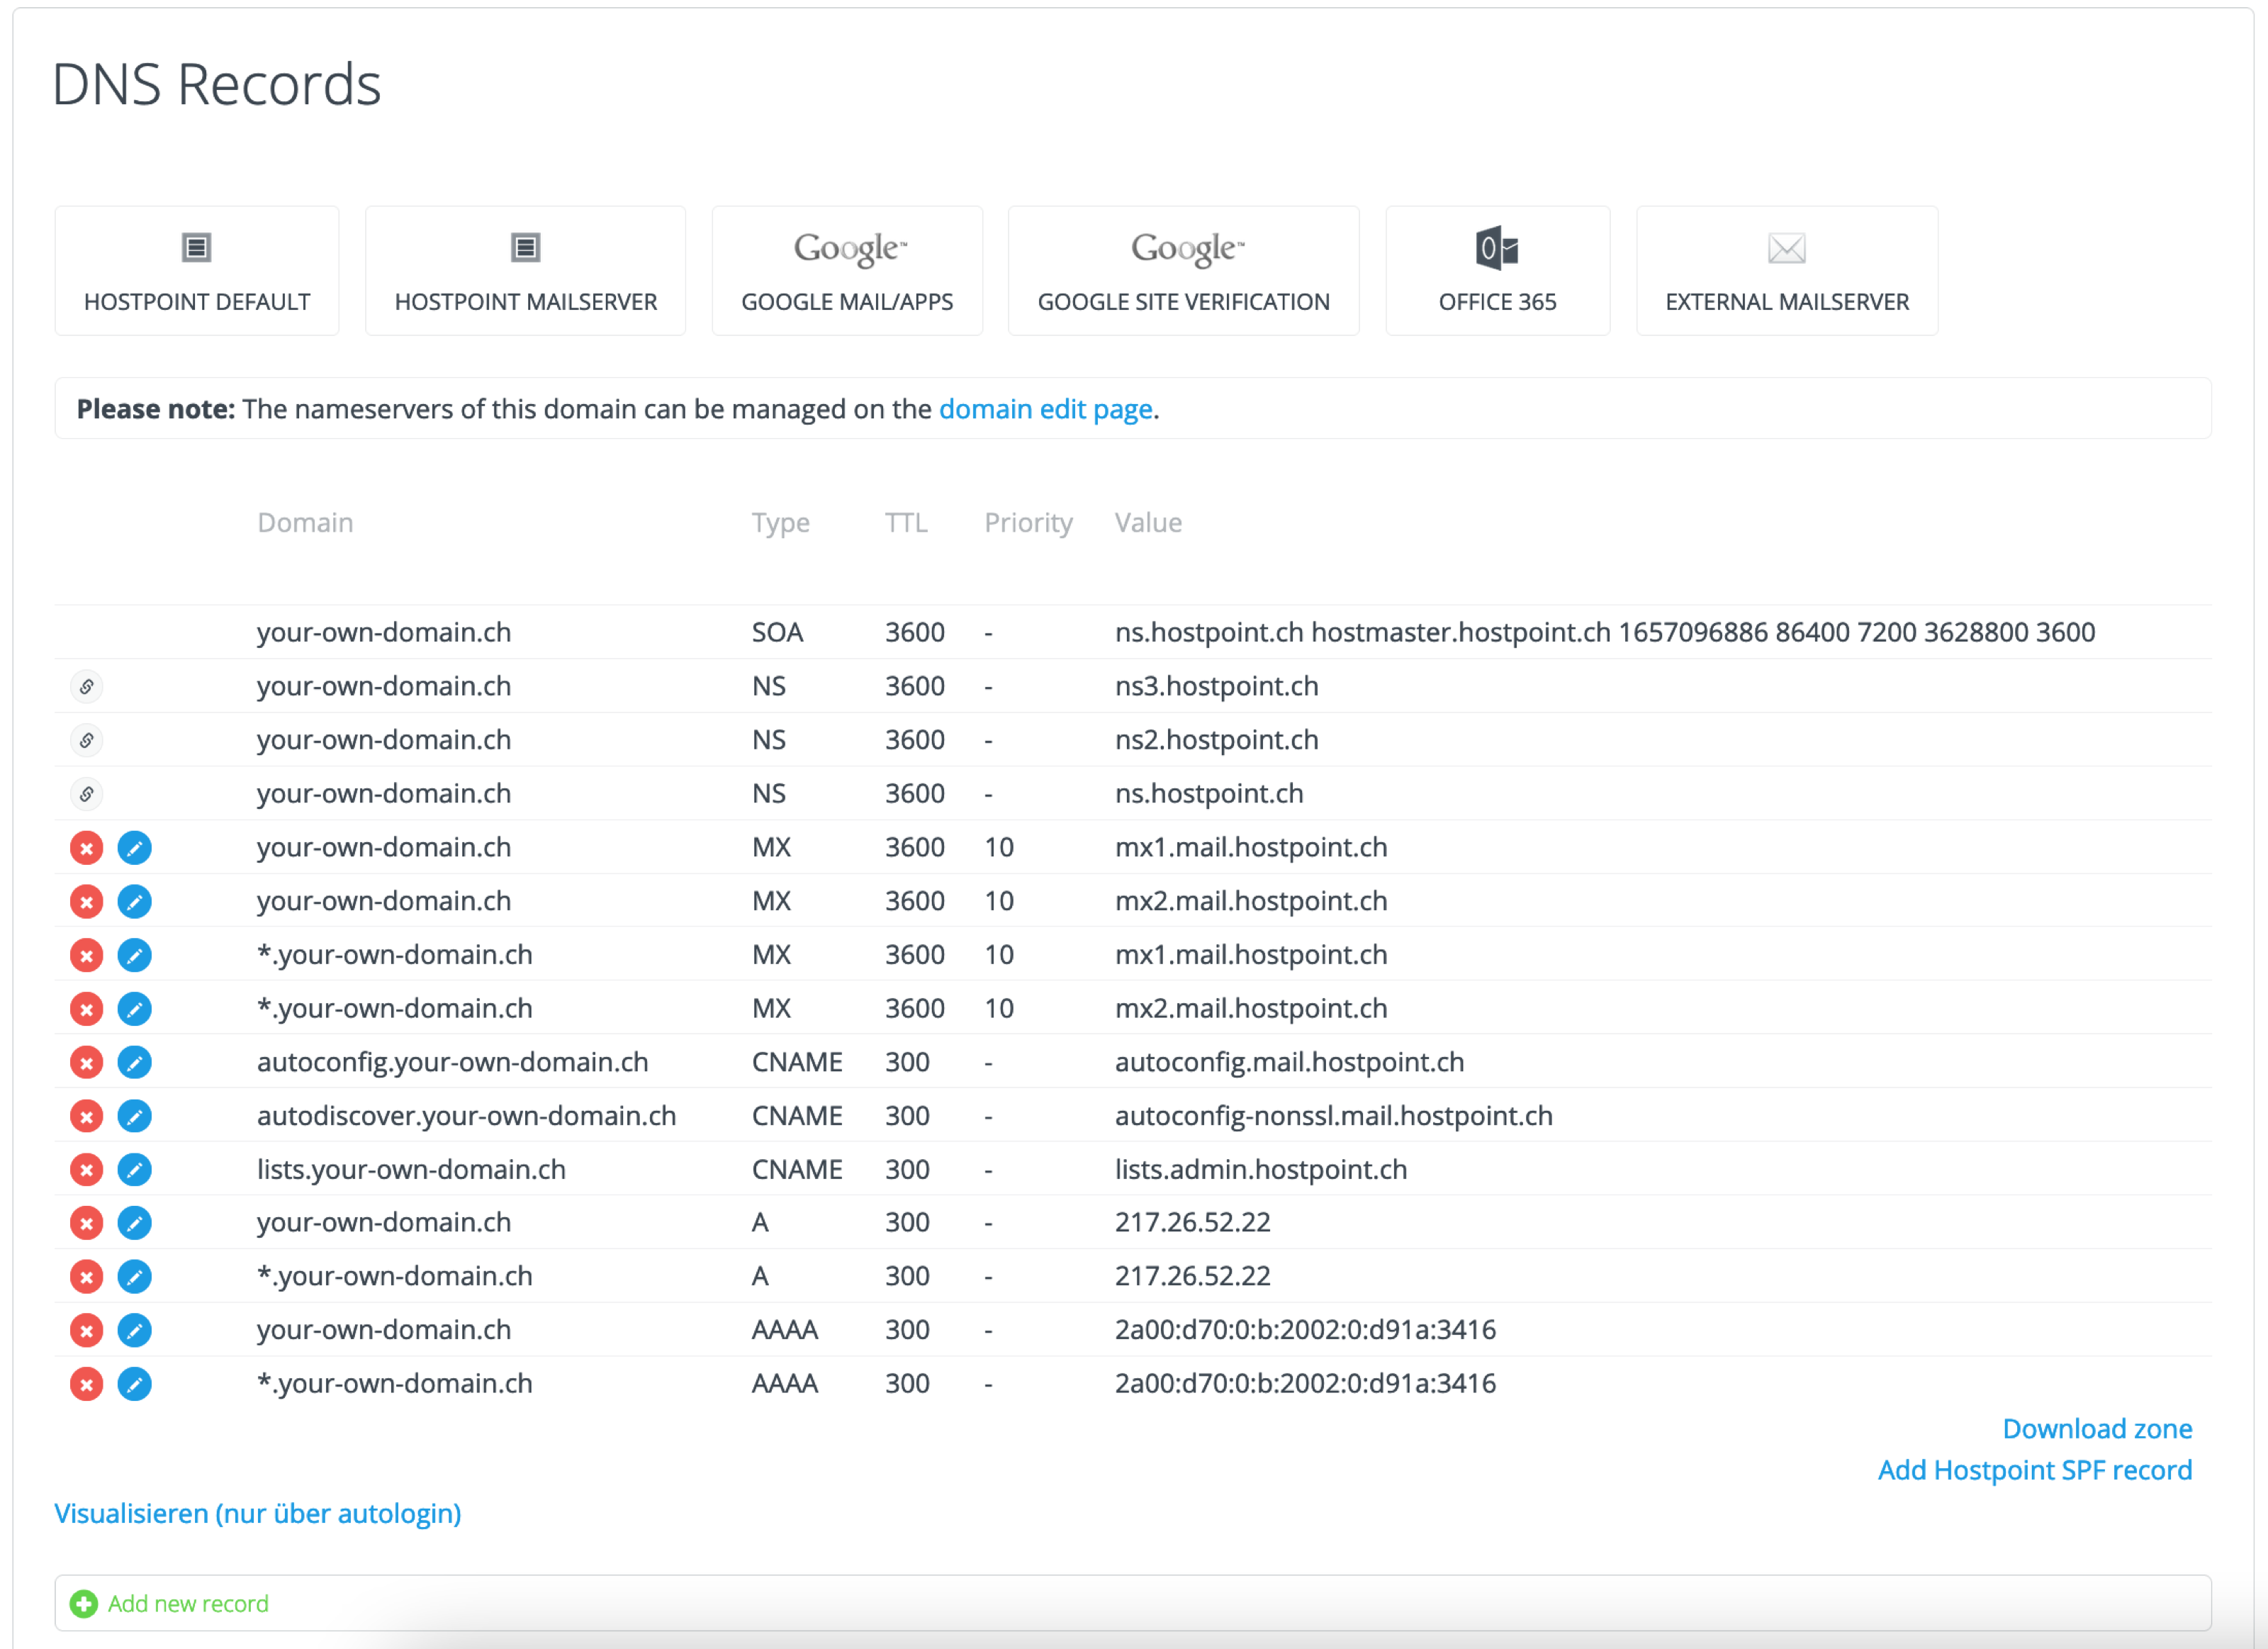
Via the link «Add new record» you can add new DNS records in the following screen:
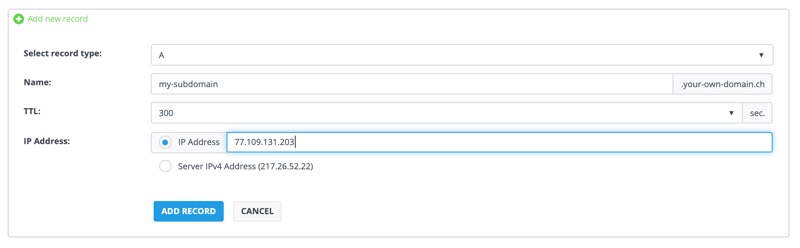
Select the desired type, name (leave this blank for the main domain), the TTL and finally the destination address as the IP address or host name (depending on the type).
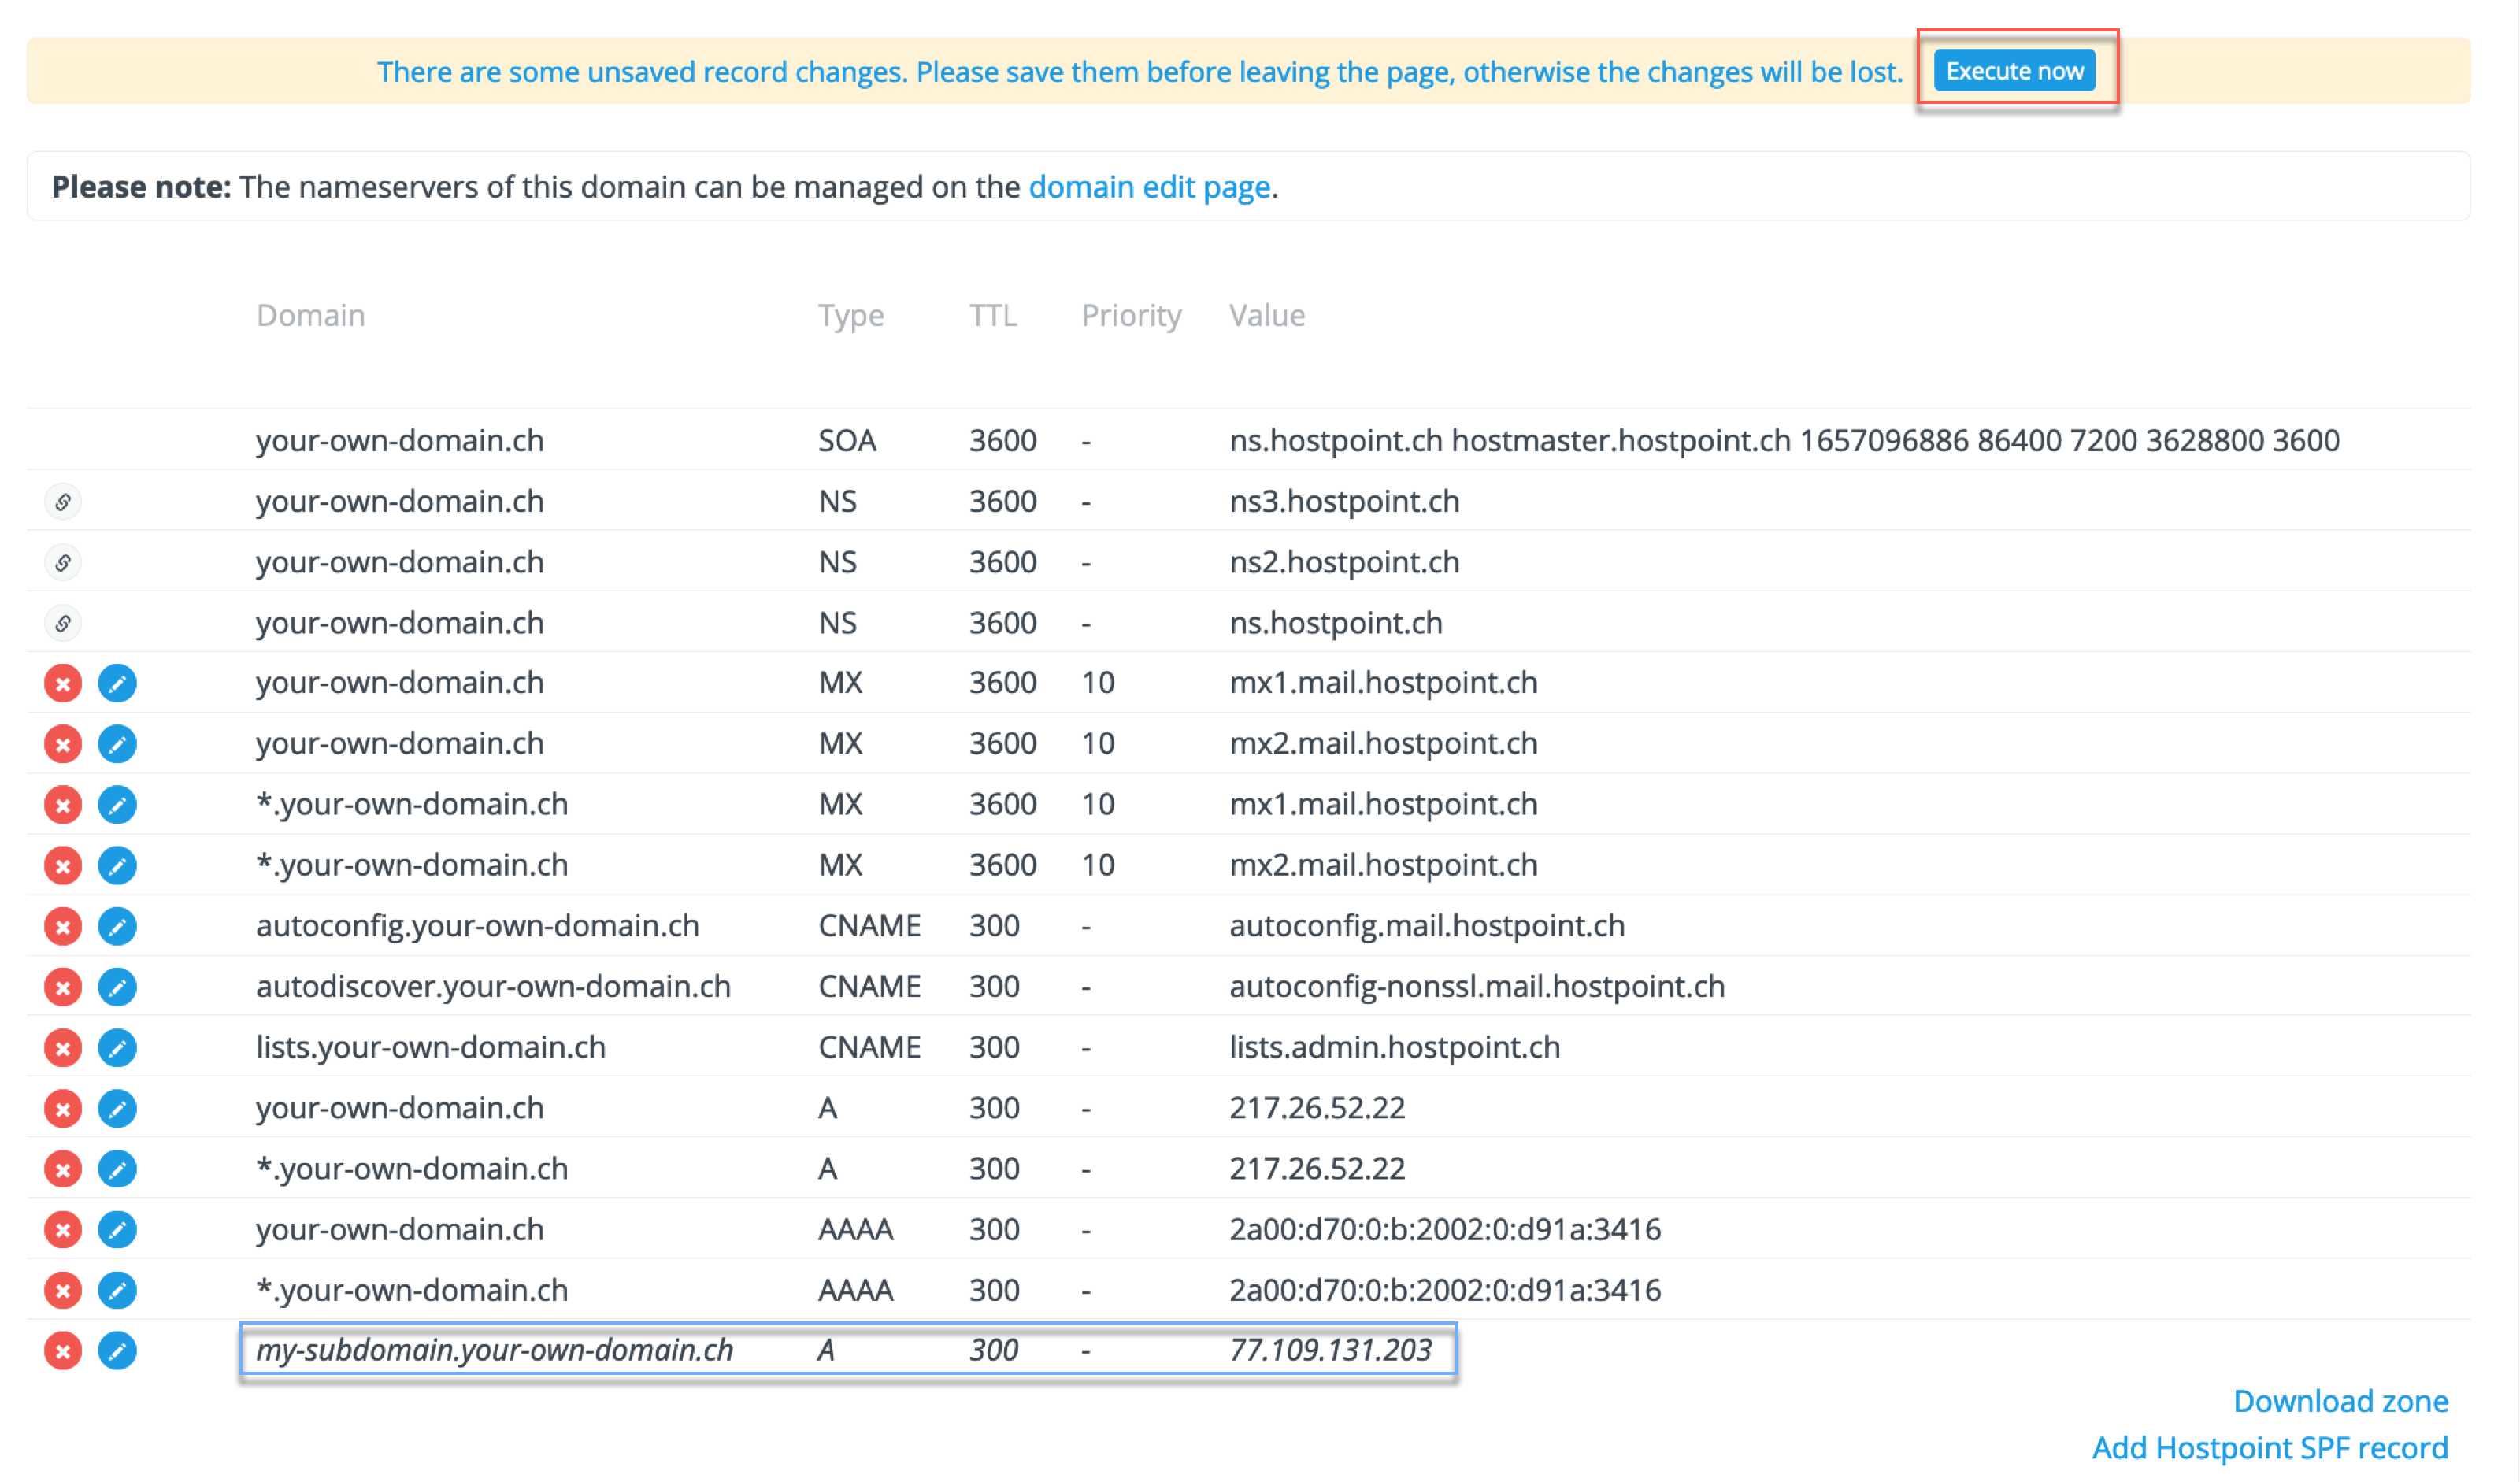
After you have added the record, it is shown in italics and saved only after clicking «Execute now».
Info: Note: Certain providers such as Jimdo, Wix or Squarespace require a CNAME or A record for a successful connection. You can receive the values required for this from your provider.
Please use this form only to provide feedback on the above guide.
For support requests please use this form instead.
For support requests please use this form instead.