



Do you already have a website but now want to manage it with Sites? In this article, you will learn how to import your website into Hostpoint’s website builder.
With Sites, you can either create a new website from scratch or import an existing website. The menu structure, texts and images are automatically carried over during the import process. Dynamic content, such as contact forms or guest books, must be added later.
The following websites can generally be imported into Sites without any problems:
- Websites that were created with a different website builder.
- Static websites with relatively simple navigation
The import can be started directly in Sites. To do so, you must have already purchased a Sites subscription and successfully completed the initial setup.
Then follow these steps:
- Start Sites in the Hostpoint Control Panel.
- Choose a design for your website. The design determines your website’s basic setup and navigation (e.g. the position of the menu). The design can be changed later if required.
Note: The text and images in the preview are examples and can be replaced later with your own content. Fonts and colors can also be customized. - Once you have found a suitable design, hover over it and click “Select.”
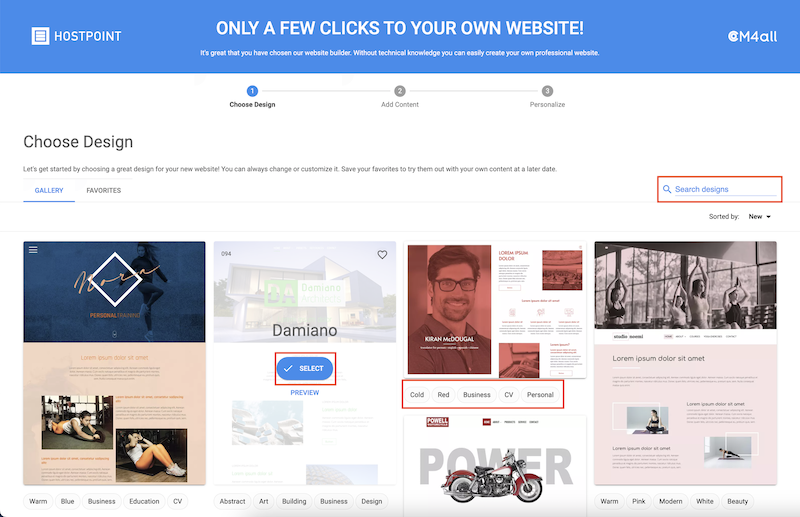
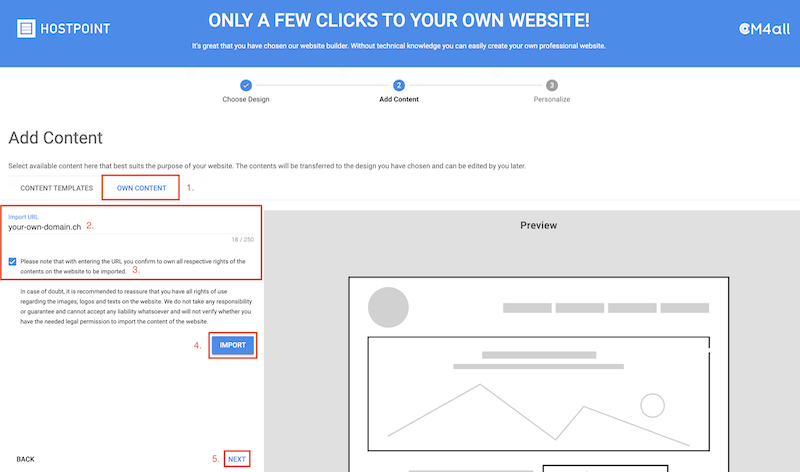
→ The page “Add content” will open. - Switch to the “Own content” tab.
- Enter the URL (internet address) of your website, and confirm that you own the rights to the website.
- Click on “Import.”
→ Your website content will be imported. When the import is complete, a message will appear. A preview is not displayed. - Click the “Continue” button.
→ The “Personalize” page will open. - Enter a title and subtitle for the website.
Note: You can also change this information later if required. - Click on “Get your website.”
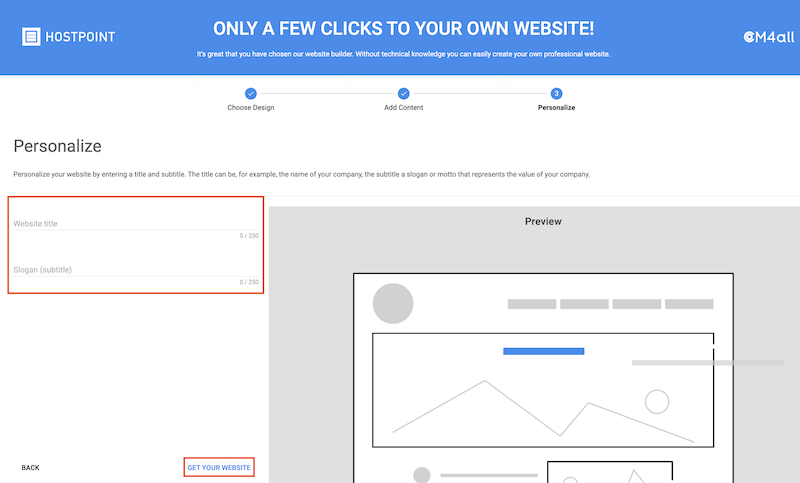
→ The website will be created. You will then be redirected to the editor, where you can further edit and complete your web site.

For support requests please use this form instead.

