")
")

You can change the domain of your Sites website in the Hostpoint Control Panel at any time.
Follow these steps to do so:
- Log in to the Hostpoint Control Panel with your Hostpoint ID.
- Open your web hosting account.
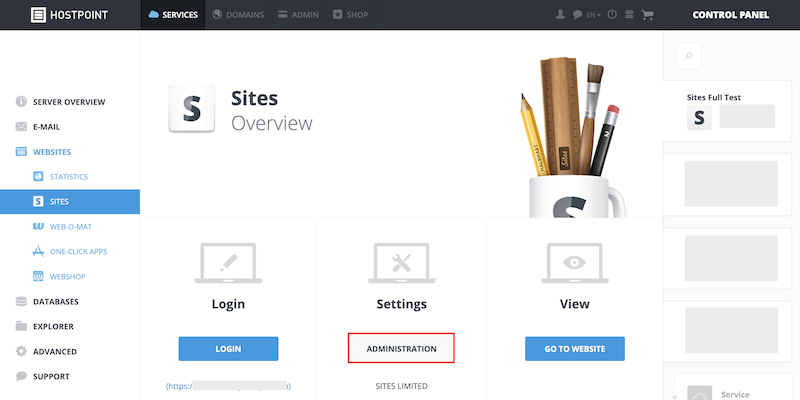
- In the left-hand menu, click on “Websites” > “Sites” and in the middle on “Administration”.
- Under “Website options”, select the new domain for your website and click on “Change website”.
Note: If the domain has not yet been registered in the domain management, you can add it by clicking on “+”.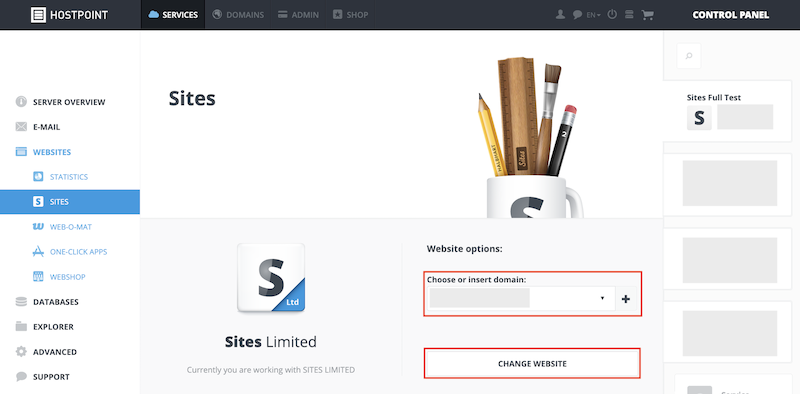
→ The domain has been changed. In order for your website to be accessible under the new domain, you need to re-publish the website in Sites.
Info: Note: Sites can only operate with a single website at any one time.
Please use this form only to provide feedback on the above guide.
For support requests please use this form instead.
For support requests please use this form instead.