")
")

Please follow these steps if you wish to configure PostFinance payment methods in your Webshop.
Create your «Postfinance Checkout» account
First you have to create a «Postfinance Checkout» account. You can do this here.
You can find a detailed procedure for converting «PSP Basic», «Startup» or «Professional» to PostFinance Checkout Flex in the PostFinance backend here.
Activate the corresponding payment provider in your Hostpoint Webshop (ePages Now)
In order to use «PostFinance Checkout Flex» and «PostFinance Checkout All-in-One» in your Hostpoint Webshop (ePages Now) site, you have to add the corresponding interface to your Webshop. You can do that by clicking on «Settings», «Payment» then «PostFinance Ckeckout».
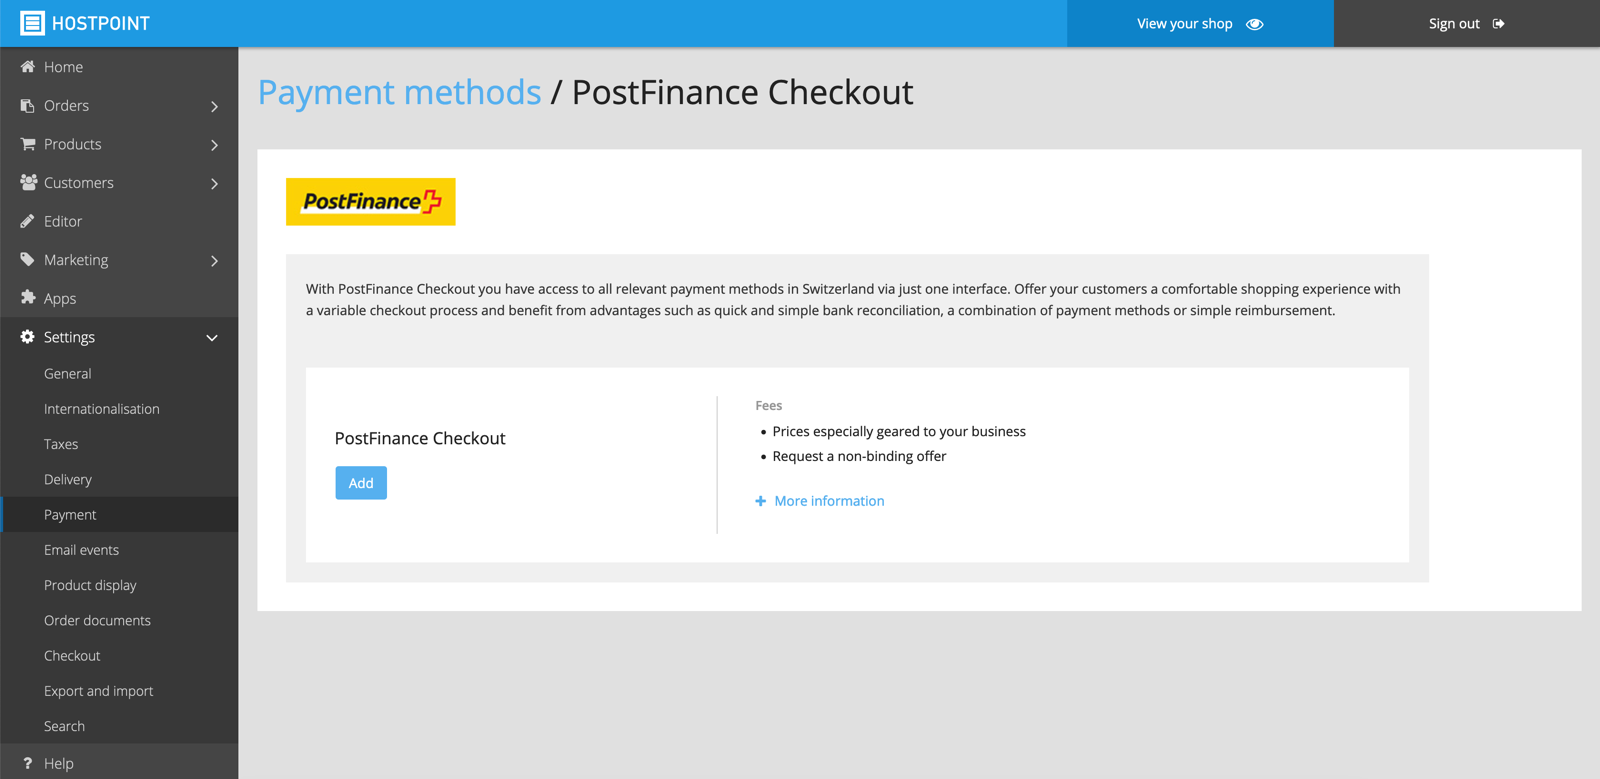
If you click on «Add» here, you will see which steps you need to perform in order to integrate «PostFinance Checkout» into your store. We'll explain them again below:
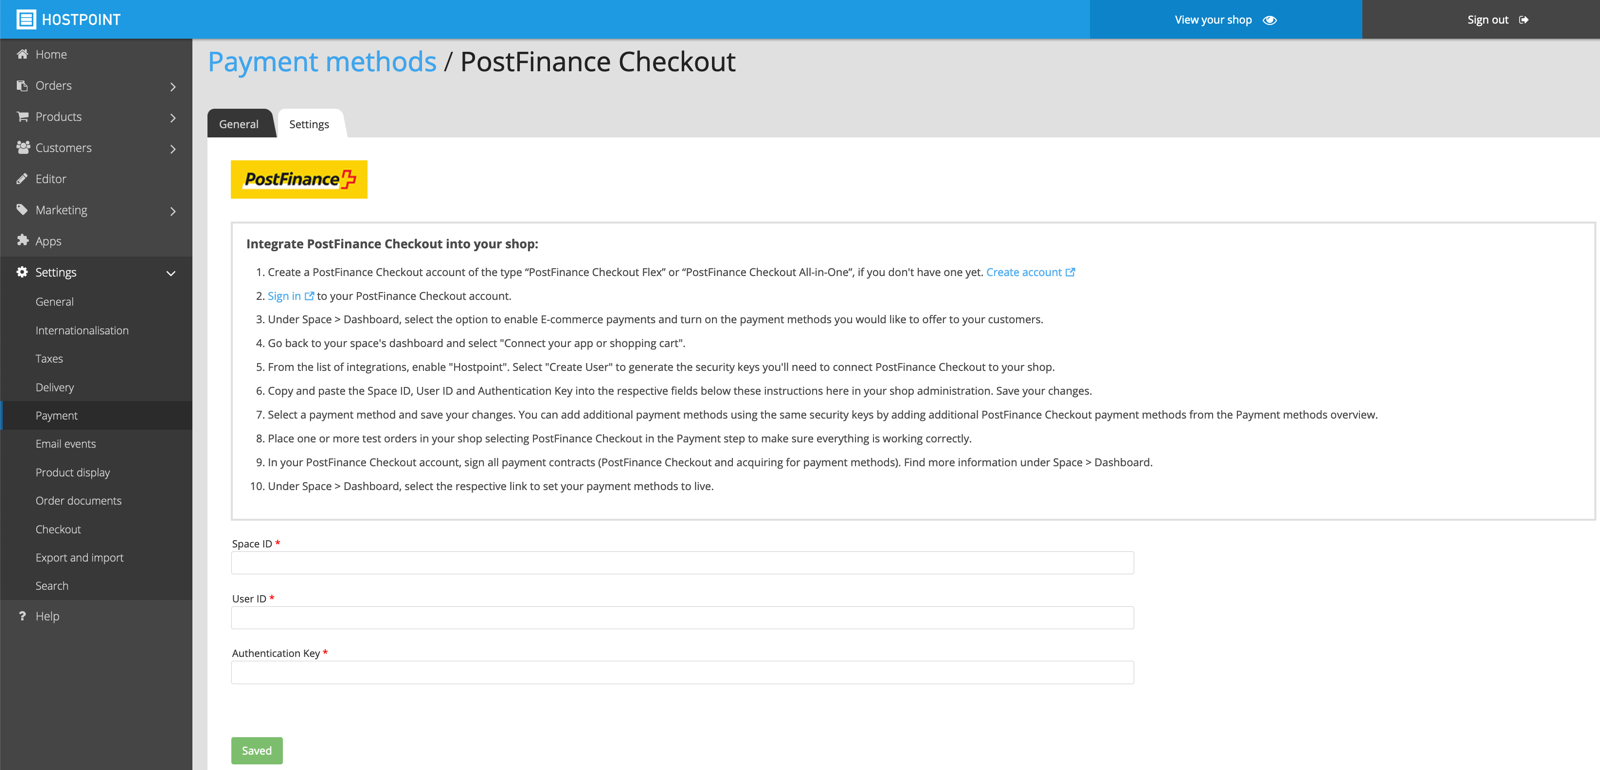
- Log in to your «PostFinance Checkout» account.
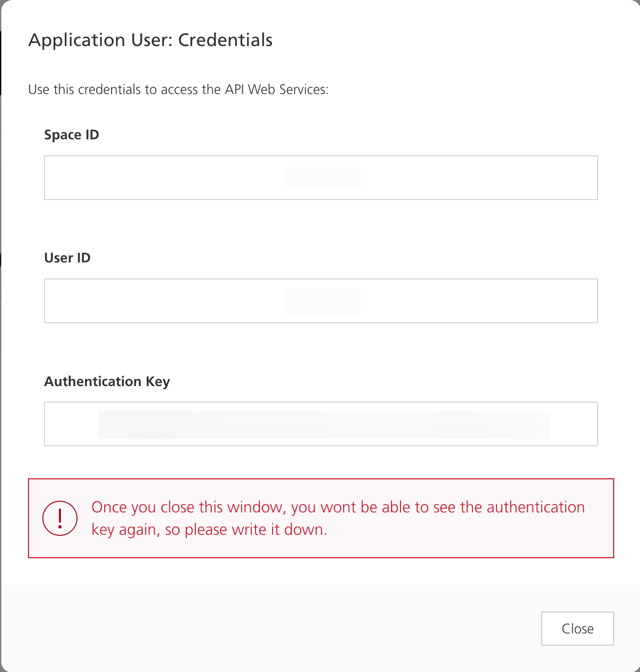
- Under «Space» > «Dashboard» > «Integrations», select the provider «Hostpoint» and click on «Activate».
- You will then see three values: Space ID, User ID and an Authentication Key. Copy these three values and paste them into the corresponding fields in your Webshop administration panel.
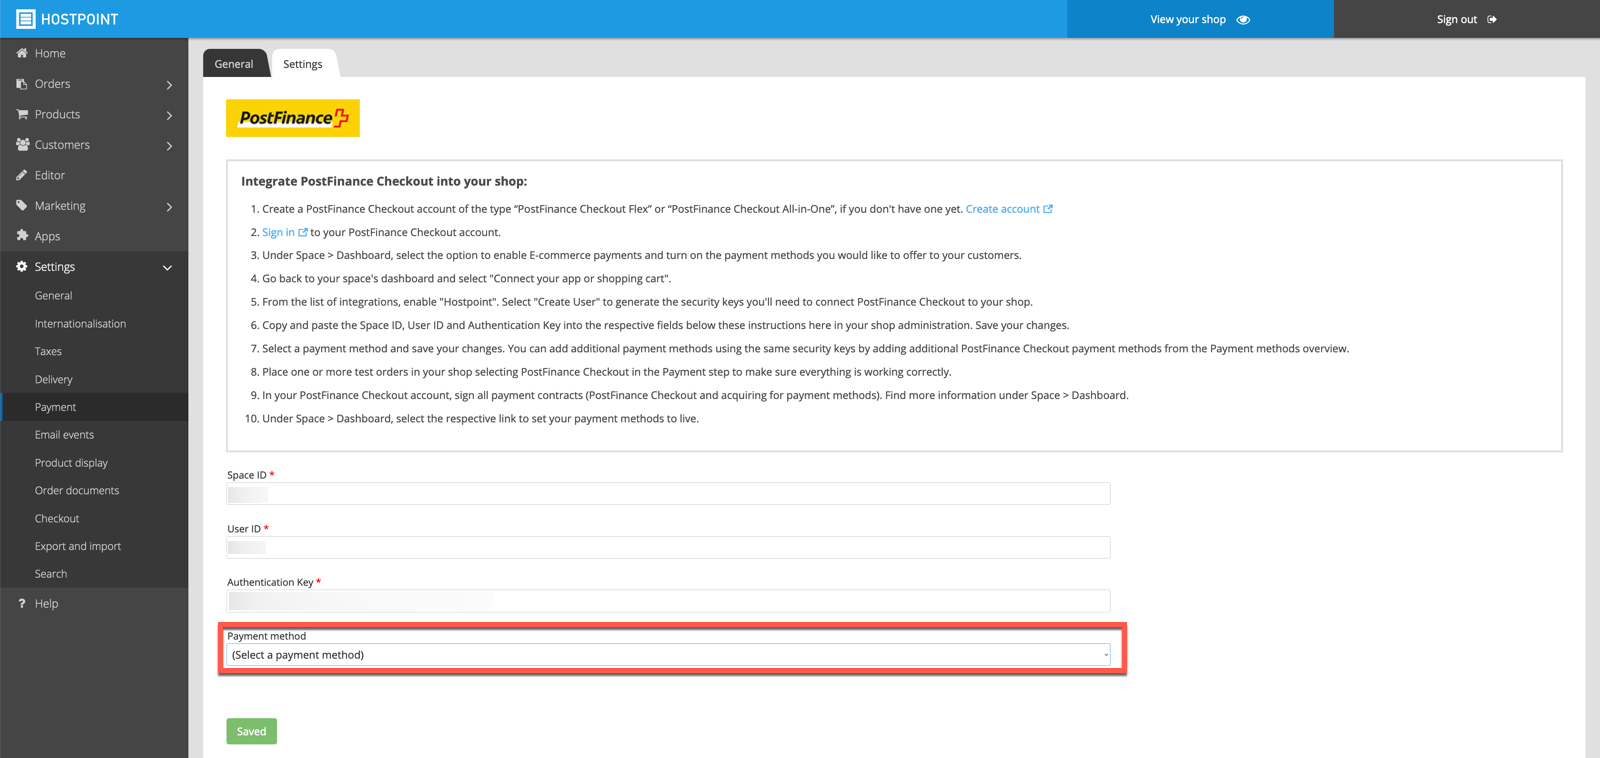
- After you have saved this, you can select the desired payment method.
Configuring the payment method
Once you have successfully saved the three values, you can select the desired payment method.
For this, we recommend that you set the payment method(s) you just selected as «visible». You can also do this in the «Payment methods» tab further down the page. To do this, check the box to the left of «PostFinance» and then click «Make visible» under «Visibility». You can also rename the payment method under «Name in store» (e.g. «PostFinance Card», «TWINT»).
For support requests please use this form instead.