")
")

Do you want to transfer your WordPress website from another web hosting provider to Hostpoint? This guide provides step-by-step instructions on how to do it. You can choose from two options: manual migration or automatic migration using a plugin.
Order web hosting product
The first step is to choose one of the web hosting products from Hostpoint that meets your requirements and order the product. A Hostpoint ID will be automatically created when you place the order. You will need this ID to log in to the Hostpoint Control Panel, where you manage your web hosting. A free test domain (e.g. your-ownmyhostpoint.ch) will also be available to you there.
Manual migration
In a manual migration, you personally transfer the data of your website from your previous web hosting provider to Hostpoint. This option makes sense if you are technically adept and highly familiar with your web hosting service. Moreover, the providers of plugins often charge a fee for large websites. A manual migration can also make sense in this case.
Back up data
To ensure a successful migration, a complete backup of your WordPress website is required. The backup consists of the following data:
- Backup of the database (usually an SQL file)
- Files from WordPress: Download these files from the server with an FTP client like FileZilla and save them on your computer.
If you need help creating the backup, please contact the support of your current web hosting provider.
Create database
The next step is to create a database for your new web hosting, into which you can then import your existing data.
Follow these steps:
- In the Hostpoint Control Panel, open your web hosting and click “Databases” in the menu.
- Then click “Create database.”
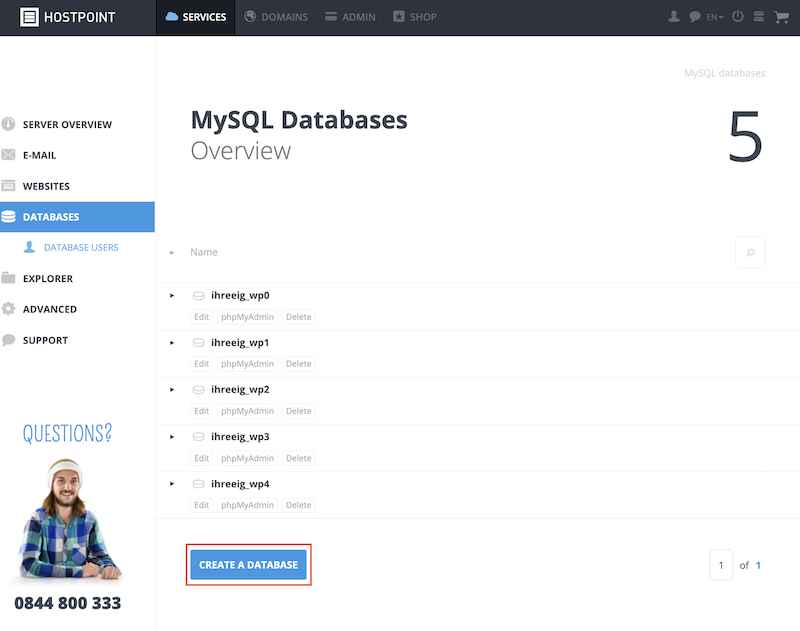
- Give your database a name, create a database user and note the following information:
- Database host
- Database name
- Database user
- Database password
→ The just-created database will be displayed in the overview.
Import database
Now you can import the backup created in step 2.1 into your new database.
Follow these steps:
- Click “phpMyAdmin” to connect to the database.
- Click “Import” in the menu bar.
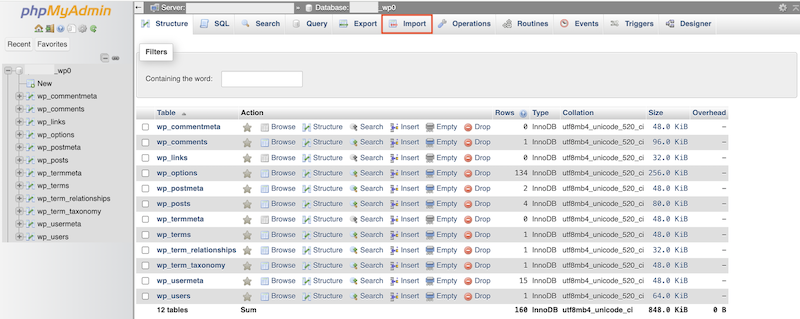
- Select the database (SQL file) you saved in step 2.1.
- Confirm the import by clicking “OK.”
→ The database has now been imported.
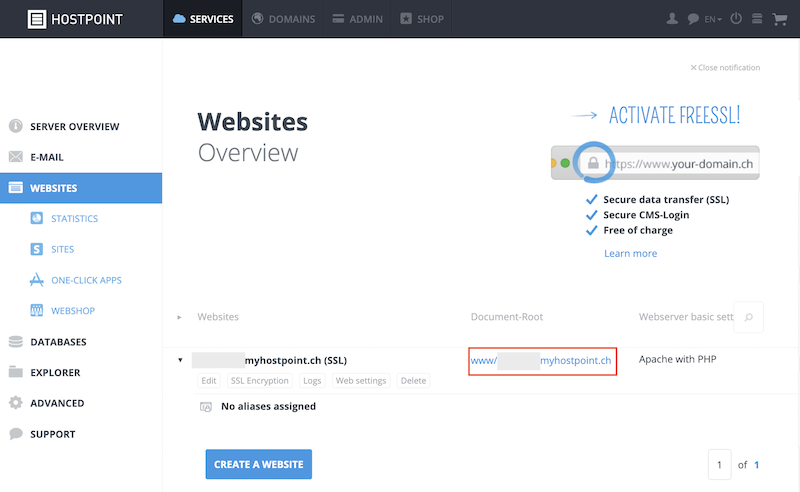
Create website
To make your website accessible on the internet, you now need to create a new website.
Follow these steps:
- In the menu, click “Websites” > “Create a website.”
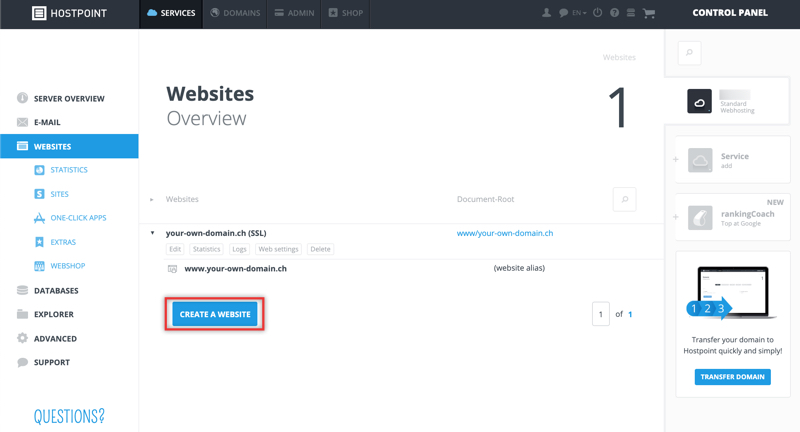
- Select your test domain. You can leave the other settings unchanged.
- Click on "Create website".
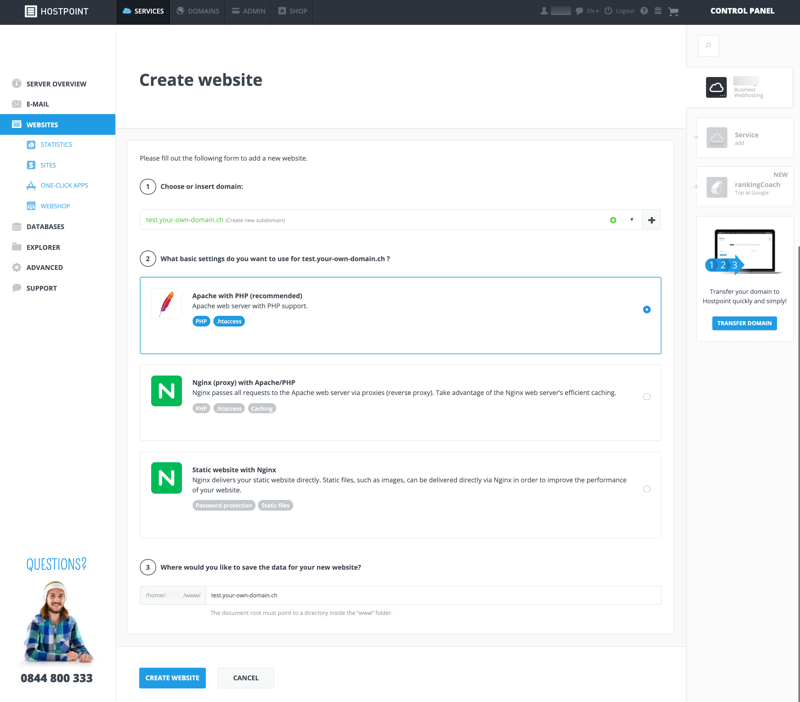
→ The website has been created. At the same time, the document root, i.e. the home directory for your WordPress website, was also created.
Upload data
Now you can upload the data of your WordPress website.
Follow these steps:
- If you have not yet created an FTP account in the Hostpoint Control Panel, you need to do this now. Follow this guide to do this.
- Connect to your server via FTP. Follow this guide to do this.
→ When you’ve established the connection, you will see the www folder on the server. This folder has subfolders with the names of the corresponding domains. - Load the WordPress files into the directory that was created during the creation of your website in step 2.4.
Change "wp-config.php" file
Finally, the configuration file of the WordPress website needs to be changed. To do this, you will need the database information that you noted in step 2.2.
Proceed as follows:
- In the “Websites” menu, click on the document root of your website.
→ The explorer opens. - Search for the wp-config.php file.
- Open the file with the text editor of your choice and change the following values:
- DB_NAME
- DB_USER
- DB_PASSWORD
- DB_HOST

- Save the file and then re-upload it onto the server via FTP.
→ If you now open your website in a browser, your WordPress website will be displayed.
Automatic migration using a plugin
In an automatic migration, a plugin does the work for you and transfers the data of your website from your previous web hosting provider to Hostpoint mostly automatically. Automatic migration makes sense if you want to transfer your website as easily as possible and without a great deal of effort.
There are various plugins for WordPress that you can use for the migration. In this guide, we describe the migration process using the All-in-one WP Migration plugin, but other plugins can be used as well.
Install WordPress
The first step is to install the “WordPress” app in your Hostpoint web hosting.
Follow these steps:
- Log into the Hostpoint Control panel.
- Open your web hosting.
- In the menu, click “Websites” > “One-Click Apps.”
→ A list of available applications is displayed. - Click “Install” by the “WordPress” app.

- Select the test domain and accept the general terms and conditions. You can leave the other settings unchanged.
- Click “Install.”
→ The installation should complete in just a few minutes.
→ WordPress has been installed. During the installation, a database and database user as well as login details for the new WordPress website were created. If you want to use your own login details, you can configure this yourself under “Login details” in step 5.
Important: After the installation and automatic generation of the login details, they are displayed one time only. Take note of this information.
Then you can log in to your WordPress account via the provided link (“Login URL”).
Install plugin
To use the All-in-one WP Migration plugin, install and activate it in the WordPress on your new website created with Hostpoint and on your original WordPress site with your previous provider. The process is identical in both WordPress accounts.
Start migration
- Start the migration on your previous WordPress website by clicking “export” in the plugin.
→ A “.wpress” file is created. - Download the file by clicking the green button.
- Upload the file in the new WordPress of your test domain by clicking “import” in the plugin. Drag and drop the file to the marked area and wait until the confirmation that everything has been transferred successfully.
→ Your entire website has now been copied to the myhostpoint test domain of your Hostpoint web hosting.
Transfer e-mail addresses
To ensure that e-mail traffic continues operating as smoothly as possible during the transfer of your website, Hostpoint uses the name server entries previously set for the domain in question.
If you also want to migrate your e-mail accounts to Hostpoint: Our migration service from Audriga makes it possible to transfer e-mails from other providers’ mailboxes to your new Hostpoint e-mail inbox free of charge. You can find detailed instructions for migrating e-mails with Audriga in this article.
Transfer domain and change name servers
In the next step, the domain is configured in order to tell it on which server the data for the new website is located. Where you enter this depends on whether your domain is still managed by the original registrar or whether it has already been migrated to Hostpoint.
- If the domain is still with your old registrar and you are not planning to change it, you must enter the Hostpoint name server details Please contact the respective registrar’s support center if you have any questions. You also have to add your domain that is not registered with us in the Hostpoint Control Panel in order to link it with your website.

- If you want to transfer your domain to Hostpoint, follow this guide. Once the domain transfer is complete, the name servers still need to be updated, as the data from the old registrar is automatically transferred. Follow this guide to do this.
Switch the website to the right domain
Lastly, for the domain to be changed successfully, a website must be created under your correct domain.
Follow these steps:
- In the menu, click “Websites” and note the “document root” of your myhostpoint test domain.
- Click on “Create a website”.
- Select your domain name in the drop-down menu.
- In step 1, enter the previously noted document root.
- Click “Finish.”
→ The website has been created. - Log in to the WordPress dashboard with your login details and go to “Settings” > “General.”
→ Here you will see the myhostpoint domain displayed twice. - Replace the myhostpoint domain with the correct domain that should be used and save it.

→ Congratulations! The transfer of your WordPress website to Hostpoint is now complete.
→ You can now test the website and then cancel your contract with your previous web hosting provider.
For support requests please use this form instead.