")
")

Would you like to use an external or separate mail service with your own domain?
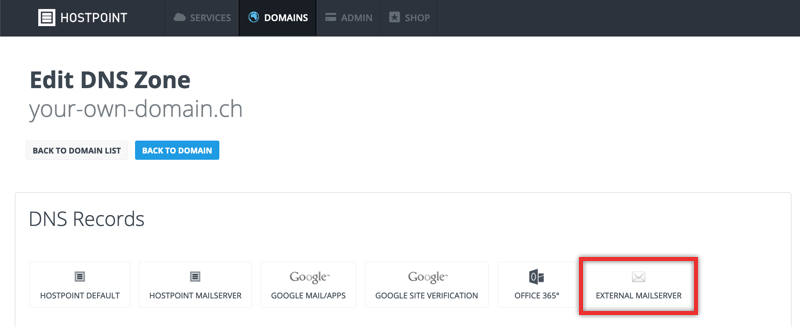
Log into the Control Panel with your Hostpoint ID. Next, click on the «Domains» menu item and then «Change DNS records» to perform DNS administration.

Click on the «External mailserver» button.
Enter the desired mailserver. If you have entered an IP address, a host with "mail.your-own-domain.ch" is set up automatically.
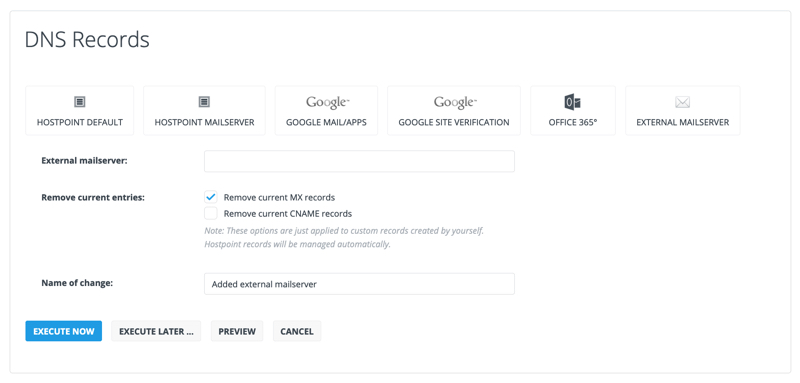
You can also choose whether or not to delete our MX records and CNAMEs (for IMAP, POP3 or SMTP).
Then, click on «Execute now».
Info: Note: Because the Hostpoint mail server is not a backup server, we recommend disabling our MX records.
If you would like to configure additional mail servers, you must manually make changes to the zone.
Please use this form only to provide feedback on the above guide.
For support requests please use this form instead.
For support requests please use this form instead.