")
")

In this article you'll find out how you can configure and use SSH in order to establish a secure connection to your Hostpoint web hosting. SSH allows you to access your server to manage files and run commands on it via a secure connection.
Configuring SSH on your server
In order to use SSH, you need the following:
- An SSH Client. OpenSSH comes standard with most modern operating systems. Just open your command line prompt (cmd.exe on Windows, Terminal on Linux or Mac OS). The "ssh" command works when the client is present. In older versions of Windows you will need a client like PuTTY.
- Your hosting username (main account)
- The corresponding password or an SSH key
- The name of the server
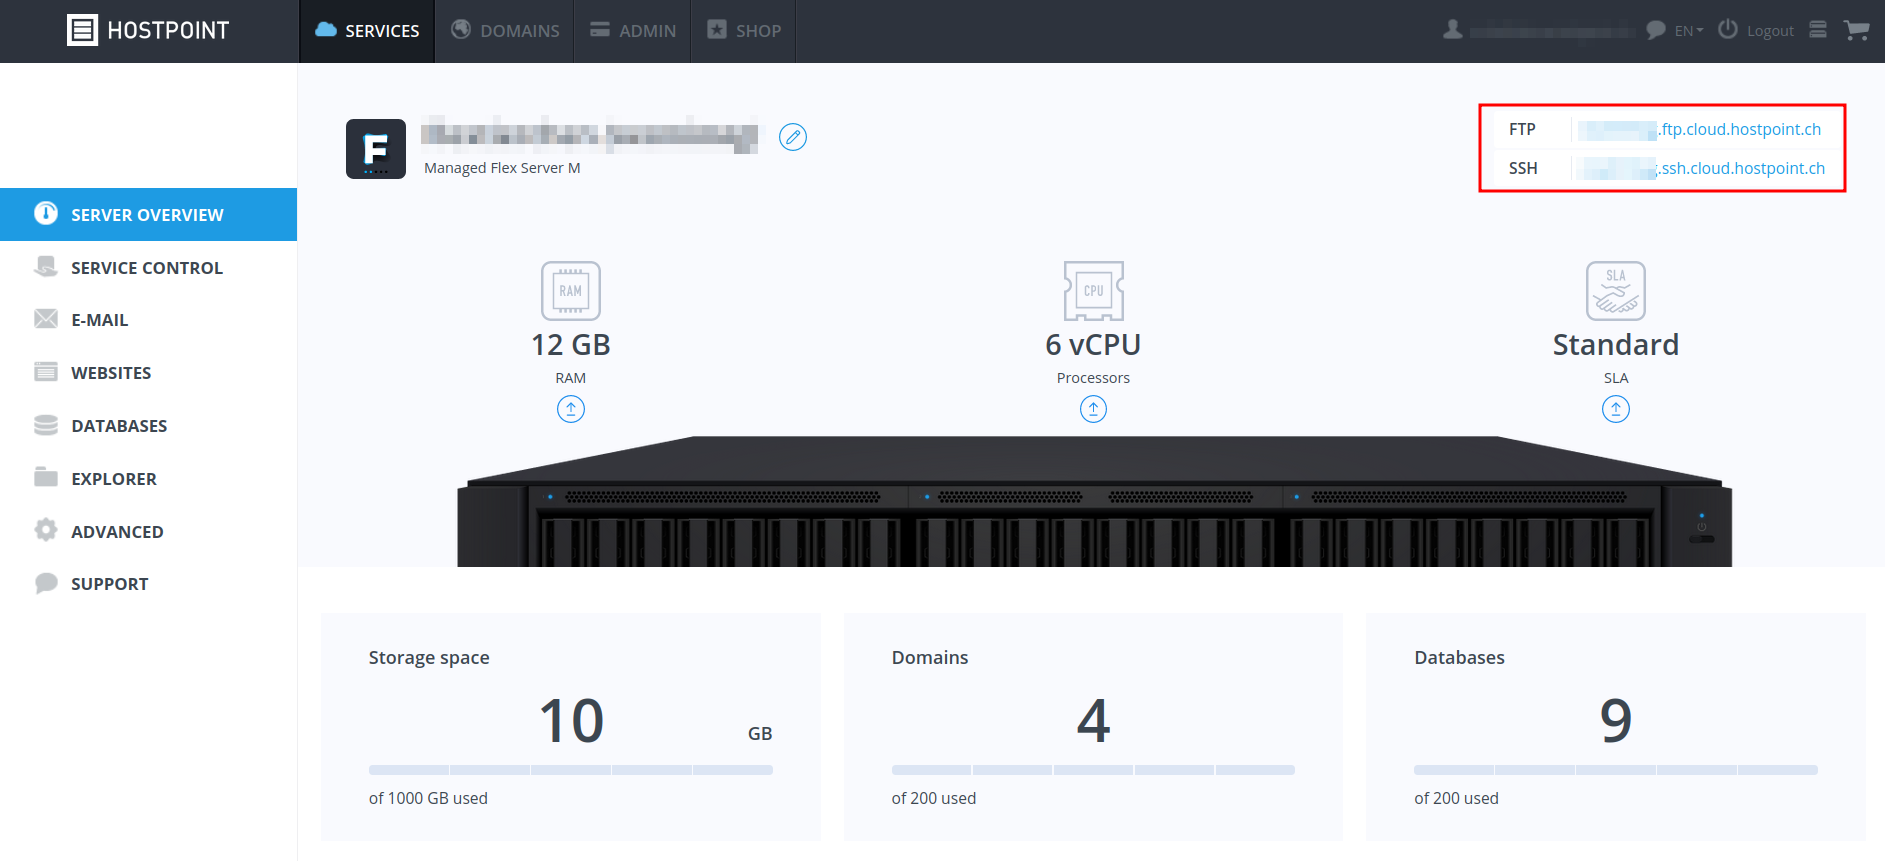
Log into your Hostpoint Control Panel at http://admin.hostpoint.ch and navigate to the desired hosting via "Services". In the "Server overview" you will find a section at the bottom right called "Identity". In there you'll see the required account as well as the name of the server to which you will need to connect. On Managed Flex Servers you'll find the hostname on the top right of the server overview page.
In the menu on the left, under "Advanced" > "SSH Access", make sure SSH access is activated. Our recommendation for the "Active Shell" is to just use the default "bash".
If instead of using a password you prefer to use an SSH key, you can add your Public Key here. You can even add multiple keys, for example, in order to allow your Webmaster to access the server via SSH without having to know the password.

Under "Advanced" > "Change password" you can reset the password for your hosting account. This is NOT the password to your Hostpoint ID, but a separate password for SSH, SQL and FTP access with the hosting's main account.

Establishing an SSH connection
Start the terminal or your SSH client and enter the corresponding data. With OpenSSH you will need to enter the username and server directly in the command. This can look as follows (replace "MainAccount" and server name "sl123" with the information retrieved from your Control Panel):
or
If you are using the SSH client of Windows 11, you must specify the option -m hmac-sha2-512 in the command to establish the connection correctly. The command would then look like this:
ssh -m hmac-sha2-512 This email address is being protected from spambots. You need JavaScript enabled to view it. or
ssh -m hmac-sha2-512 This email address is being protected from spambots. You need JavaScript enabled to view it. If you're connecting to your server for the first time, you may be asked whether you wish to trust the "Fingerprint". To be sure this is the right server, you can compare the IP address in the message with the one that appears in your DNS Zone. Then you can establish the connection by entering "yes". You can find out how to have the Fingerprints automatically checked in our article What are common problems in accessing with SSH?
For support requests please use this form instead.