")
")

To schedule a follow-up appointment in Cloud Office, proceed as follows:
- Log into Cloud Office with your e-mail address and your password.
- Go to the calendar in the blue menu at the top.

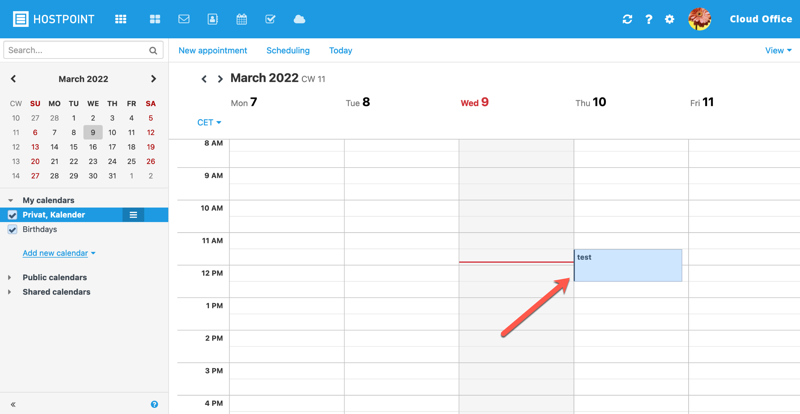
- Select the calendar on the left and then click on the corresponding date.
- Click on “Follow-up appointment”.
→ The information from the existing appointment will be transferred to the next date.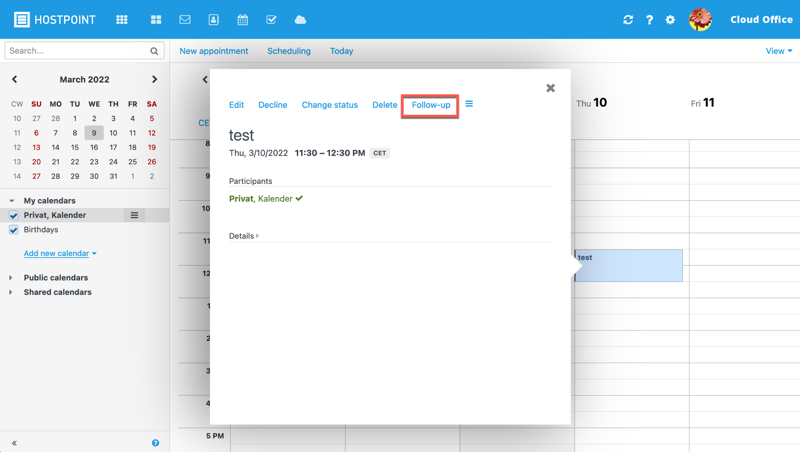
- Define the settings for the follow-up appointment
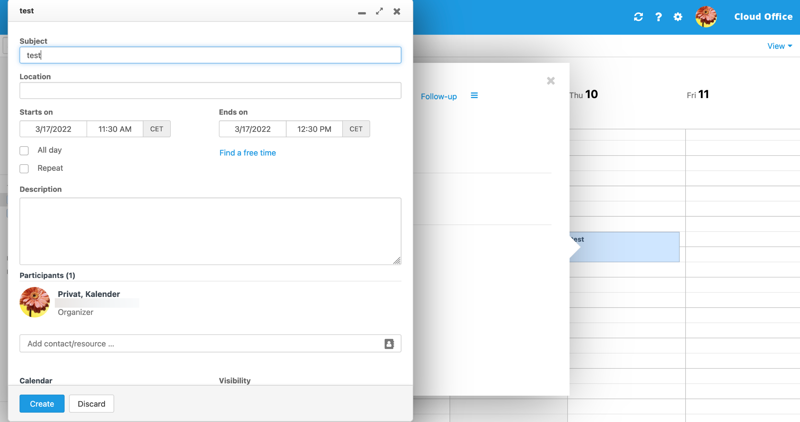
- Create the desired follow-up appointment by clicking on “Create”.
→ The follow-up appointment has been created and sent to the participants.
You can also find more information about Cloud Office features in the online help.
Please use this form only to provide feedback on the above guide.
For support requests please use this form instead.
For support requests please use this form instead.